The BEST luxury coop you’ll ever buy: Spoil your chickens with Rita Marie’s

Most of the chicken coops you buy on the market are crap. Maybe that sounds a bit harsh, but it’s just the truth of it. The majority of premade coops for sale are cheaply made, too small, and fall apart within the year.
Have your doubts? Check out my review article of a typical chicken coop, called Why you should NEVER buy a coop from Amazon or Walmart. You’ll find photographic evidence from my experience of just how bad your average coop is, and why they’re unfit for any chicken.
Because of this, in the past, I’ve always built my own coops, purchased coops others have built off Craig’s list (always a gamble), and I’ve even converted a shed into a coop.
But what if you don’t have the time, skills, or motivation for building or converting your own coop?
Wouldn’t it be nice if you could just buy a premade coop and not have to worry about anything else?
I sure think so, and this is what I decided to do for my next set of chickens (coming soon!).
But I couldn’t find anything locally, so I scoured the internet, looking for a good prebuilt coop. Rita Marie’s Chicken Coops were by far the most impressive I could find—a luxury experience, in fact, and at an affordable price.
Amish-built, ultra-durable, beautifully designed, and… heated roosting bars? Doesn’t get better than that!
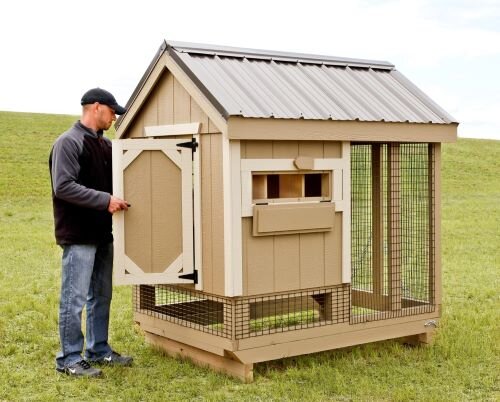
I’ve since ordered and received my new Rita Marie’s Chicken Coop, and it’s just as high-quality as it looks online. I’m tickled by how it’s turned out, definitely my finest coop yet.
Rita Marie’s Chicken Coops are the best chicken coops I’ve been able to find anywhere. They’re high quality, affordable, and can be shipped to most locations. However, you will need to request a few modifications when you order if you want to ensure your birds will be living in luxury.
In this article, you’ll learn:
You’ll definitely want to check out the end of this post, where I’ve written down for you all the modifications you’ll need to request. You can just copy what I’ve written and paste it in your order form! Couldn’t be easier.
Please note I am now an affiliate for Rita Marie’s Chicken Coops. This means if you order a coop through one of my links, I will receive a small commission at no extra cost to you.
The pros of Rita Marie’s Chicken Coops
Pro #1 Rita Marie’s Coops are high-quality and American-built.
Rita Marie’s Chicken Coops are hand-built by builders in the Eastern U.S. The majority of the coops are actually built by the Amish. If you’re not familiar with Amish products, you’ll be happy to learn that Amish communities are renowned for their incredibly high-quality work.
The coops are built with high-quality materials, and the wood that touches the ground is pressure-treated pine, making it very durable in wet and harsh conditions.
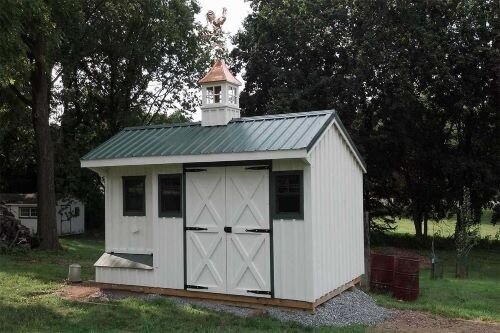
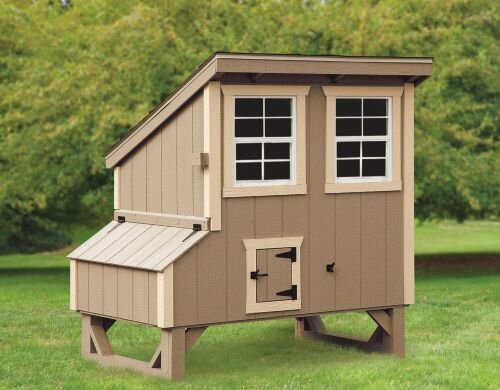
Pro #2 Rita Marie’s offers many different chicken coop styles and sizes.
Rita Marie’s Chicken Coops come in many different styles, such as as:
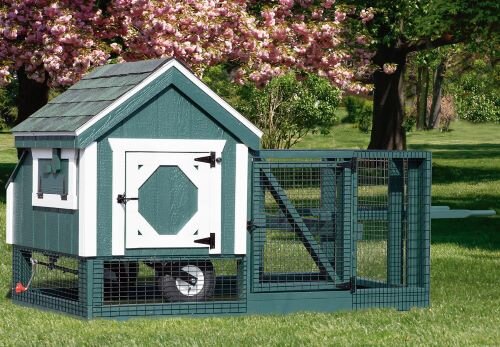
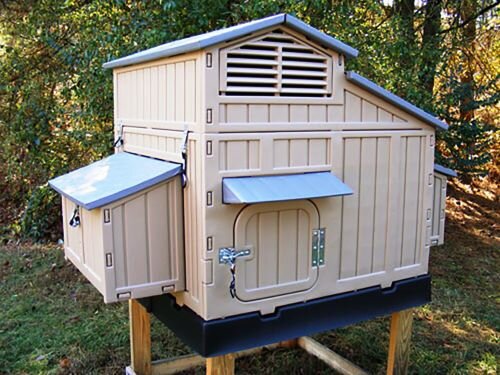
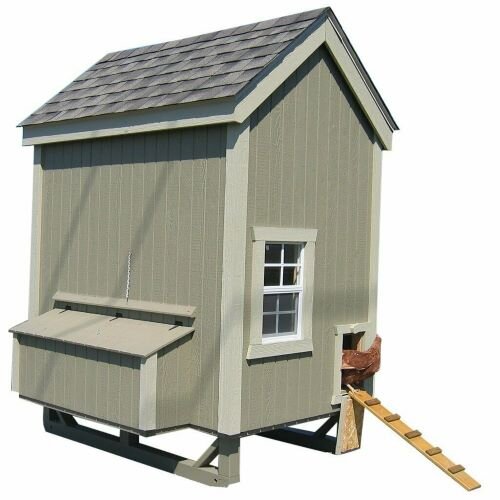
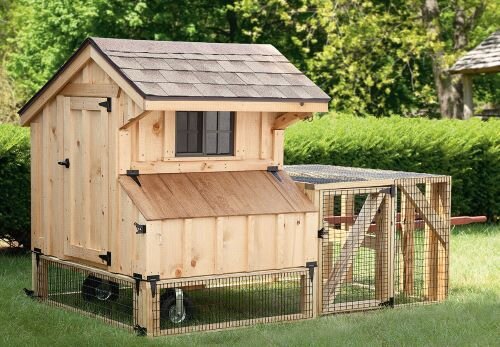
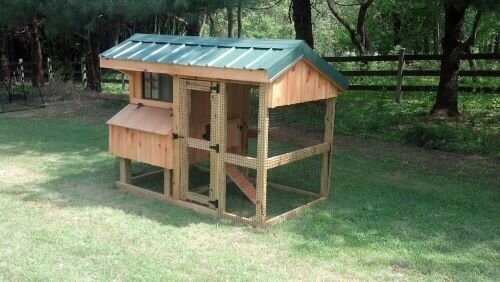
You can see some of these styles in the photo slideshow below. If you see a style you like, click on the photo to see more examples of coops in that style.
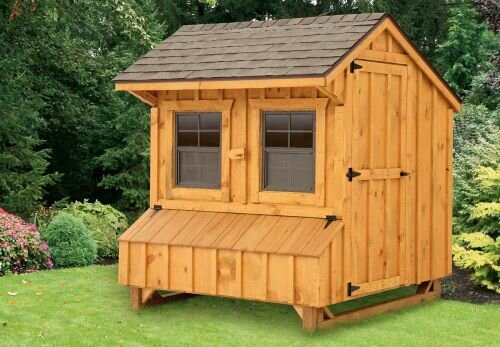
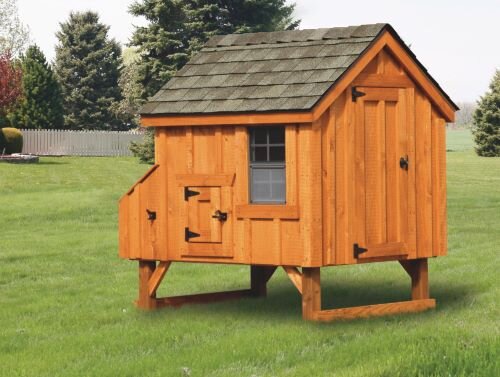

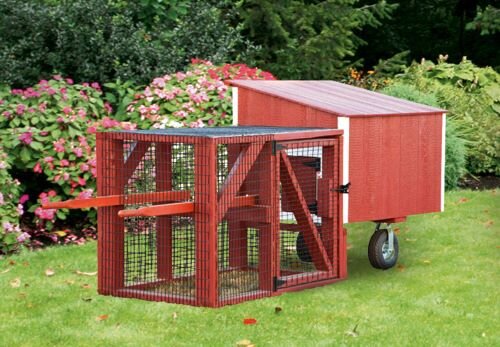
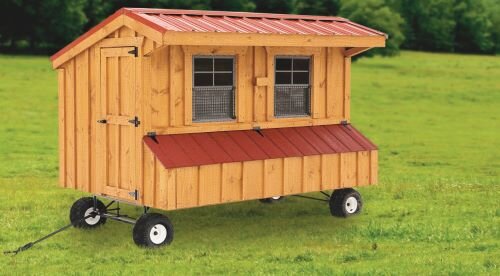
You can also get a mobile tractor-type coop, so if you want to move your coop around your land, you can easily do so. You can see what these coops look like in the slideshow below. Most of Rita Marie’s coops can be upgraded into the tractor-style.
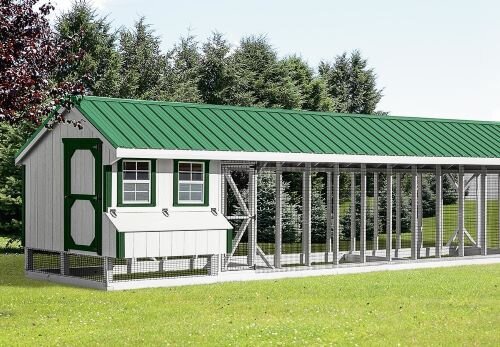
You can get a coop as small as 3x3 or as large as 12x24, as you can see in the photo slideshow below. Many of the coops are walk-ins.

You can also buy coop kits, such as those pictured below. However, you will need to assemble these yourself.

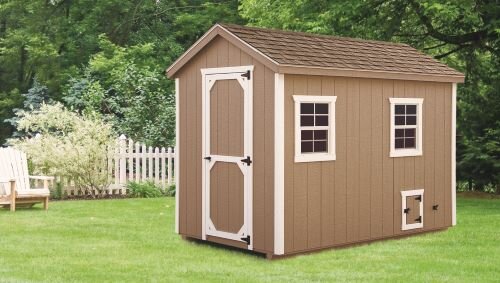
Pro #3 Rita Marie’s Coops are available in a million different colors.
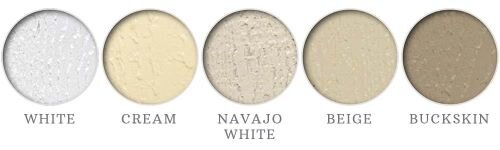
Okay, maybe not a million different colors—but a lot! You get to decide the main color of your coop and the trim color of your coop, and you can choose from paint colors or stain colors.
In the photo slideshow below, you can see the paint colors available.

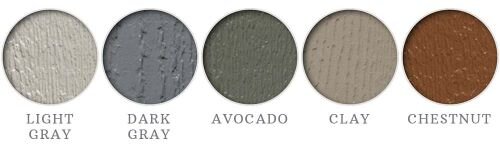
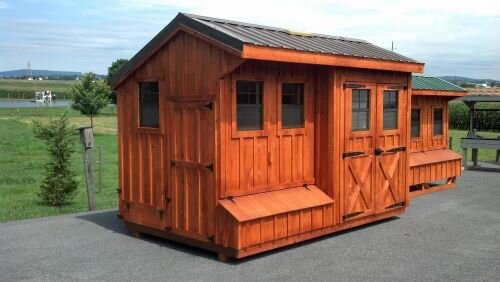
Or, if you prefer stain, rather than paint, you have several different stain options as you can see in the photo below.

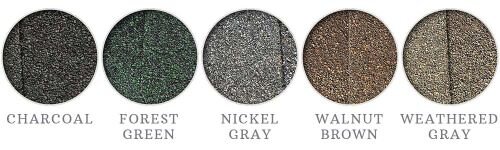
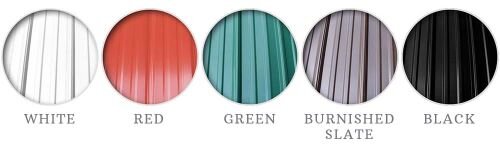
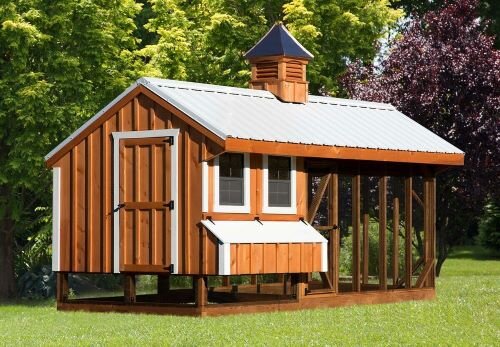
And then you also get to decide what roof color you want. You can get a shingle roof or upgrade to a metal roof. You can see roof color options in the photo slideshow below.
You can see the colors I chose in the photo at the top of this post—Rustic Cedar stained board and batten siding with a Charcoal-colored shingled roof.
Pro #4 You can add a run to your Rita Marie’s coop.
You can also buy a coop with an attached run. Check out the slideshow below to see a few of these. You’ll see the runs can be large and roofed, small and wire-framed, or anything in between.
You can also add wire to the bottom of many of the runs—highly recommended to keep burrowing predators out.
Pro #5 Rita Marie’s offers a long list of optional add-ons and upgrades for your coop.
Rita Marie’s Chicken Coops are highly customizable.
Here are some of the features you can add to your coop:
Automatic door with either an electrical package or a solar package
Clean-out lid, so you can sweep the bedding straight out of the side of the coop
Decorative cupola (available on select models)
Electrical package (light and plug-ins)
Extra chicken door
Extra man door
Extra vents
Extra windows
Feeders and waterers
Floor protection (epoxy or glass board), which makes your floor very easy to clean
Heated roosting bars
Insulated ceiling
Wheel kit with steering handle (so you can make your coop into a chicken tractor)
Wire over windows (to keep predators out)
Not all of these extras are offered for all coops. Different coops have different possible upgrades.
I chose a few upgrades for my coop: heated roosting bars, the electrical package, ceiling insulation, and gable vents.
Pro #6 You can get heated roosting bars installed in your Rita Marie coop—a safe way to warm your chickens!
This is something really special and unique. Rita Marie’s Chicken Coops are the only chicken coops I know of that offer heated roosting bars—what a great upgrade!

Not all of the coops offer this upgrade, but most of them do.
Why heated roosting bars?
Your chickens will be ecstatic to sleep on heated roosting bars during those freezing cold winter nights.
Although chickens survive very cold winters, they can be pretty miserable during those ultra-cold days. And your chickens’ feet and legs get so cold! Really, they feel like ice.
Heated roosting bars will really help to keep your birds comfortable.
I can’t wait to test out mine—and neither can my chickens!
Pro #7 Rita Marie’s Chicken Coops are custom-built, so you can design your coop to your liking.
This is one of the best things about Rita Marie’s Chicken Coops that you won’t find elsewhere. If you want to make minor changes to your coop, the builders will make those changes for you!
So, for example, I didn’t want all the nesting boxes that came with my coop, so I requested fewer nesting boxes that were wider in size. The builders happily accommodated me.
I made some more important changes as well, changes I recommend everybody make. I have these changes listed at the end of the article, so you can just copy and paste them into your order form.
Pro #8 Rita Marie’s delivers across the contiguous United States.
Sorry, Alaska and Hawaii, seems you guys are always left out. But for the rest of us, woohoo! For more on shipping, check out Rita Marie’s shipping process.
Pro #9 Rita Marie’s will place your prebuilt coop in your yard for you.
If you order one of the Amish-built IHS Coops, you can opt to have the coop placed exactly where you want it in your yard. This does cost extra, but reduces your hassle tremendously.
This is not a service I’ve seen other companies offer. Most companies will drop your coop off at your house or driveway, and many will even make you assemble it yourself. (Rita Marie’s does offer a few kits if you’d rather do that, but the majority of their coops are preassembled.)
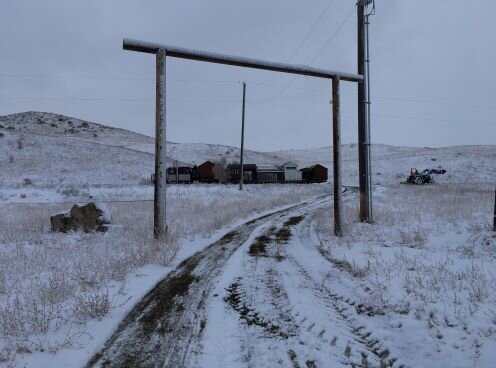
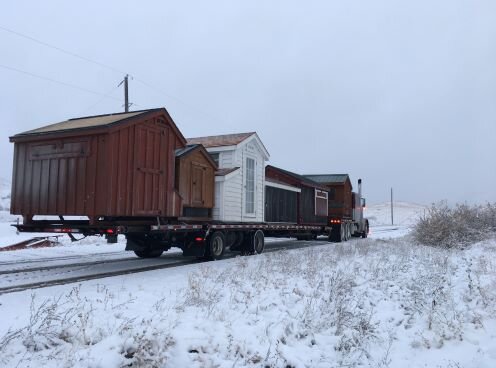
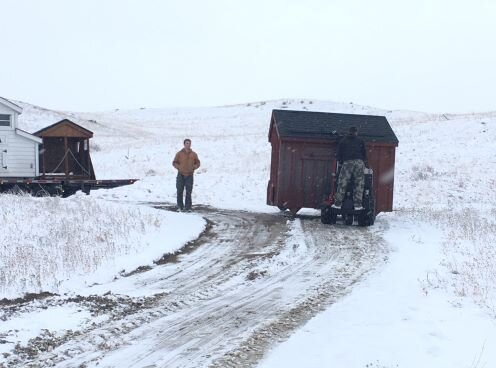
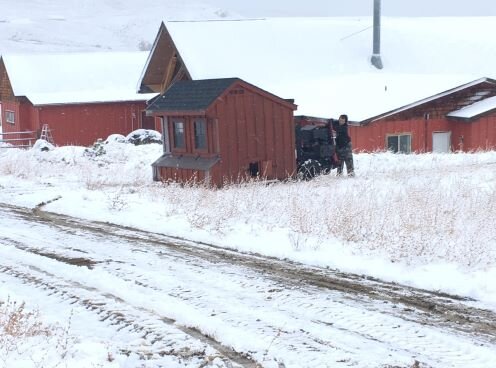
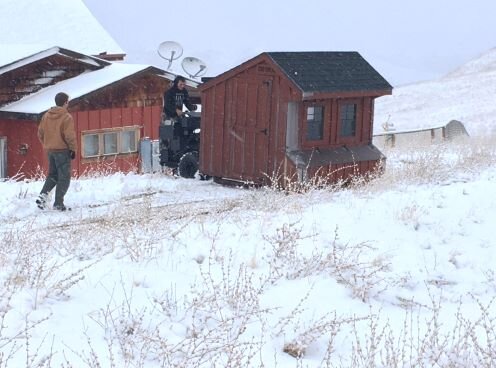
Here is the process that is used to place the coop in your yard:
“[The delivery man] will use a motorized shed mover to place the coop anywhere he can get to. If you have fencing, trees, mud holes, ditches, obstructions etc., keep all of that in mind as you’re planning the perfect spot for the coop. You will need a path 8-10 feet wide and 10 feet tall clear all the way to the destination. As long as he can drive it there, he’ll place it there.”
Want to see this delivery in action? Check out the photo slideshow below to see how my coop was delivered and moved into my yard.

Pro #10 Rita Marie’s offers zero-interest coop financing!
Through PayPal credit, you can pay for your chicken coop over a period of 6 months with zero-interest financing.
Pro #11 Rita Marie’s website is phenomenal—ordering is so easy.
The Rita Marie’s Chicken Coop website is as good as it gets.
You can easily find the coop you want, either by style or by flock size. And then they give you step-by-step instructions on how to order, how to add any upgrades, and what to expect with delivery.
This really may be the best part of getting a Rita Marie’s Chicken Coop. Everything is easy, no-hassle.
Pro #12 Rita Marie’s customer service is exceptional.
Have a question? Have a problem?
Use Rita Marie’s contact form. They will get back to you very quickly and address any questions or concerns. I’ve contacted them several times and have always been pleased with their service.
If they can put up with my constant barrage of questions with a smile, I’m sure they’ll be great to you too.
The cons of Rita Marie’s Chicken Coops
I would love to be able to tell you that Rita Marie’s Chicken Coops are perfect. But they’re not.
Unfortunately, these coops have some of the problems I’ve found in all prebuilt coops.
But luckily, all of the problems with Rita Marie’s Chicken Coops are easy to fix. And I’ve even got the instructions below for you to copy and paste into your order form!
In most of the cases below, you can simply ask the builders to make the changes you want (and I’ve even included the modifications you need to request at the end of this article—you can just copy and paste what I’ve written!).
You may need to fix a couple of the coop problems yourself, but as you’ll learn below, you can make all these changes in a few hours tops without much effort.
Con #1 Many of the coops don’t have a good ventilation setup.
This is the bane of buying any chicken coop. I’ve never found a premade coop that does ventilation quite right.
Here’s the problem. The ventilation in premade coops, including in many of Rita Marie’s, is built too low. This isn’t a problem at all in the hot months (your girls will love a draft), but in the cold months, you may end up with drafts at chicken-level.
At best, winter drafts will make your chickens miserable, and at worst, drafts will cause them to freeze to death.
Many of the Rita Marie coops, especially the smaller ones have wall vents that are just too low to remain open in the winter. These vents open directly next to the roosting bars, meaning, air will blow straight into your chickens. Again, great for the summer, but catastrophic for the winter.
You can see what I mean in the photo below.

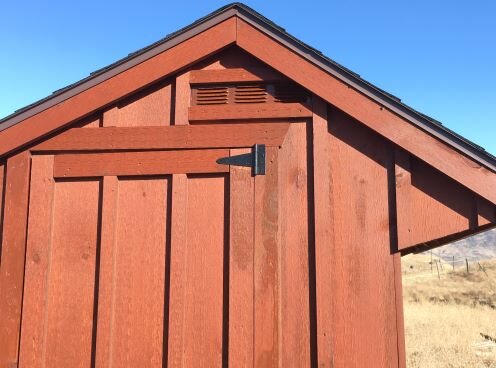
So, what do you do? I requested the higher roosting bar be lowered to the same level as the lower roosting bar. You can see how much this helps in the photo of my coop below.

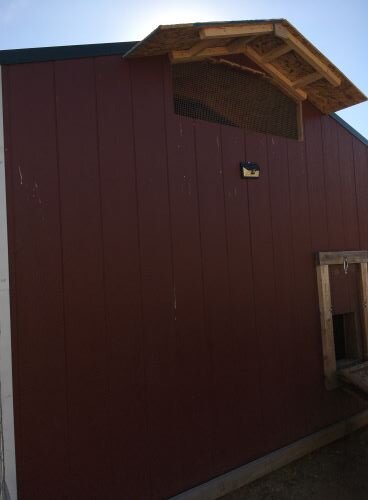
However, if you buy a smaller coop, there may not be enough room for your roosting bars to be lowered. But you can request the builders add two gable vents as high as possible. You can see what one of these looks like in my coop pictured below.
These gable vents are small, so I’m not sure if they’ll provide enough ventilation for the winter or not. I do use sand in my coops, so my coops don’t need as much ventilation as coops that contain organic bedding.
So, I’ll test my gable vents out this next winter and see if they’re sufficient. If the gable vents do not provide my chickens with enough ventilation, I’ll add some more ventilation myself.
If you are unsure how to add your own ventilation to your coop, check out my article, Chicken coop ventilation: 21 design ideas with pictures. Check out #10 specifically—this is the easiest, fastest, and cheapest way to add ventilation. And it’s so simple, you can’t screw it up.
Although this ventilation problem is a con for Rita Marie’s Chicken Coops, every other coop company also has this problem. I mean literally. Every. Single. One.
At least adding a little extra ventilation yourself is pretty easy to do. It’ll take you all of 5-10 minutes.
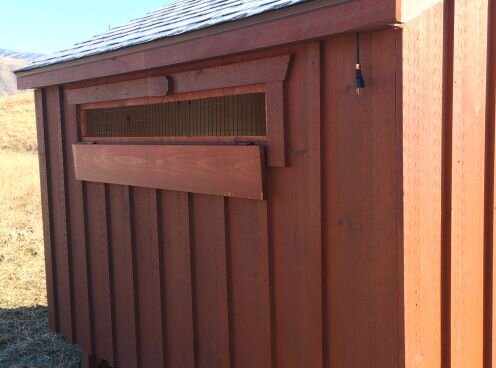
Con #2 The wall vents may let in rain and snow.
Rita Marie’s Chicken Coop wall vents open downwards and don’t have any covering above them. This means that rain and snow could easily blow into the coop through the vents.
You can see what I mean in the photo slideshow below. The first photo shows a wall vent from my Rita Marie’s coop. The second photo shows a vent my husband cut in one of our other coops (a converted shed). You can see my husband added a covering to the vent to keep the rain and snow out of the coop.
So I will likely keep the wall vent in my Rita Marie coop closed in the winter. I’ll see if my gable vents provide enough winter ventilation, and, if not, I’ll take 5 minutes and add some more myself.
Again, if you need help adding ventilation to your coop, see my article, Chicken coop ventilation: 21 design ideas with pictures. Design idea #10 is the quickest and simplest fix.
Con #3 You will need to request a couple simple modifications on your coop—but you can just copy the instructions below and paste them in your order form!
Almost all of Rita Marie’s Chicken Coops will require a few modifications.
For example, the company makes these 2 mistakes with their roosting bar design:
2x4 roosting bars are placed with the 2” side upwards, instead of the 4” side.
Multiple roosting bars are staggered.
Chickens are much more comfortable roosting with the 4” side of the roosting bar facing up. This allows them to sleep more flat-footed, so they’re able to keep their feet warmer (their toes are nestled in their warm feathers).
And the problem with a staggered roosting bar setup is that it can lead to aggression. All chickens want to roost on the highest bar, and they’ll fight each other for it. The weaker chickens will be forced to roost lower.
When you limit your chickens’ resources, whether it’s not enough food, not enough space, or, in this case, not enough ideal roosting spots, you add unnecessary discord to the flock.
Luckily, all you have to do to fix the roosting bar design is make a request to the builders when you order. You can copy this request below.
And I’ve already written out the request for you at the end of this article—just copy and paste it into the order form.
Another modification you’ll need to request is the location of the chickens’ pop hole door. Rita Marie’s Coops place the pop hole doors at floor level, which is too low.
Because you need to put bedding in your chicken coop, your pop hole door needs to be installed above the level of the bedding. Otherwise, you’ll keep losing bedding out of your pop door.
And, in the case of Rita Marie’s pop doors, which are on the smaller size, your chickens may have a hard time getting out the door because the bedding would be blocking it.
I’m not sure why they’ve designed their coops this way, but no worries!
Just tell the builders in advance that you want your pop door raised—just copy this request written below.
Again, I’ve written this request out for you to copy at the end of this article.
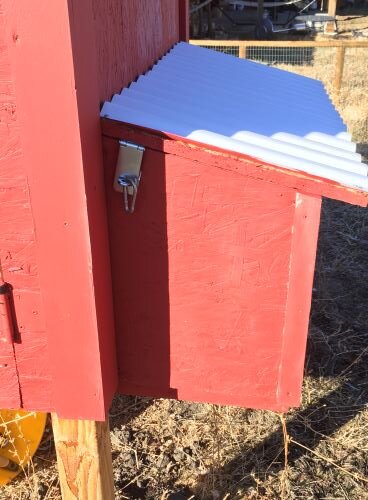
Con #4 Rita Marie’s external nesting boxes don’t have latches to keep predators out.
Many of Rita Marie’s coops have external nesting boxes, which are wonderful. You can gather the eggs without having to go inside the coop, and your chickens have more floor space inside the coop. Genius!
However, the nesting box lids don’t have latches on them, and many wild animals may be capable of getting into the coop by lifting the nesting box lid. I’m especially worried about raccoons and weasels here.
Once again, this is a problem I’ve seen with all pre-built chicken coops—every single one. And once again, it’s easy enough for you to fix.
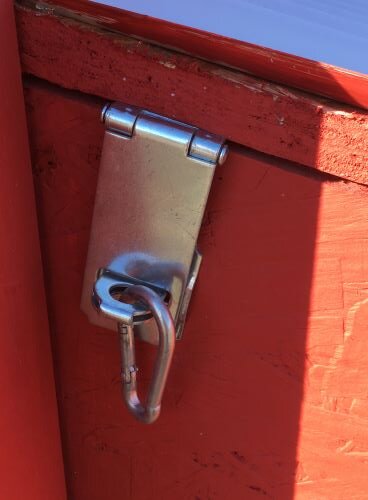
You’ll just need to add your own protective latch.
Check out the photos below of one of my other chicken coops to see the type of latch I recommend installing on your nesting boxes. This is a padlock-style latch with a carabiner.
Con #5 Rita Marie’s Chicken Coops don’t have wall insulation.
Let me be clear—Rita Marie’s does allow you to add ceiling insulation to your coop. I recommend you do that.
But Rita Marie’s does not give you the option of insulating the walls of the coop.
You may need to add your own, and this is easy to do.
Where I live, insulation is not optional. In the dry, exposed Idaho foothills, shade is practically non-existent, so my coops get blasted by the sun during our 80-100° summer days. My coops absolutely must be insulated to help protect my chickens from the heat. I’d risk losing them to heatstroke, otherwise.
Additionally, if you care about your chickens’ comfort, and not just their survival, insulation is mandatory for cold winters. The exception to this is if you’re heating your coop.
Most chickens—yes, even the “cold-hardy” breeds—are miserable in freezing weather, and insulation can go a long way in making them more comfortable.
Once again, this isn’t just a Rita Marie’s problem. Every company is the same here. I don’t know why prebuilt coops don’t ever come with an insulation option, but they don’t.
However, it really doesn’t take you that long to install insulation, and I highly recommend you add it to your Rita Marie’s coop (or any other coop you may have).
The exception to this is if you live in a really hot and humid climate, like the American South. You may get a lot of bugs living in your insulation in that type of climate. Consider adding fans to your coop to help with the heat instead, and always place your coop in the shade.
Con #6 Shipping across country can really increase your costs.
I had my Rita Marie’s chicken coop shipped from Pennsylvania—the state where it was built—to western Idaho. That’s a long haul!
So, it’s not surprising that having the coop shipped to me added quite a chunk of change to my final bill.
But like I said, I tried to find a coop locally—I even looked in neighboring states—but I couldn’t find anything that met my quality standards. And when I spoke with shed companies about building me something custom, they were more expensive than buying and shipping from Rita Marie’s.
And if you live closer to Pennsylvania, your shipping costs will be much lower than mine.
If you’re wondering how much shipping will cost for you, it’s easy to find out. All you have to do is go to Rita Marie’s website, add the coop you’re interested in to your “Bag,” and then proceed to checkout. You will see the shipping costs before they ask for any payment.
Con #7 You’ll need to order your Rita Marie’s Chicken Coop long before you need it.
Because Rita Marie’s Chicken Coops are in such high demand, it may take months for your coop to be built and delivered. I ordered mine in August and it was delivered in November.
So if you want one of these coops, you can’t wait till the last minute!
Final verdict: Rita Marie’s is the best premade coop you’ll find
Overall, I think Rita Marie’s Chicken Coops are the best prebuilt coops on the market.
I searched high and low locally, in neighboring states, and across the web to find a decent prebuilt coop at an affordable price.
Rita Marie’s is it.
Although you will have to request some modifications (see below), these prebuilt coops really are as good as it gets. You won’t find anything better out there.
Rita Marie’s Chicken Coop modifications: Just copy and paste!
In order to make things easier for you, I’ve summarized the changes I recommend you request if you order a chicken coop from Rita Marie’s Chicken Coops.
When you order, there is a place that says “Order Comments.” Copy the text below and paste it in the “Order Comments” section.
You may also want to use Rita Marie’s contact form to verify they got your requests.
Here’s what you’ll copy and paste:
Please make all the modifications below:
Build both roosting bars at the lower level, parallel to each other (not staggered).
Build the roosting bars 8 inches apart.
Build the roosting bars with the 4-inch side facing up (not the 2-inch side).
Add gable vents as high up near the roof peak as possible.
Build the pop hole door so the bottom of the door is 8 inches above the floor (not at floor level).
Thank you.
You may need to modify some of the requests above if they don’t apply to the particular coop you’re getting or to your specific needs.
For example, if you buy one of the smallest coops, you’ll only have one roosting bar in it, so you would want to delete #1 and #2 above.
Or, if you’re planning on using the deep litter method, your bedding may end up being 6-12 inches thick, so you would want your pop hole door a foot off the ground, not 8 inches.
And, if you want to add gable vents (#3) above, I suggest you double check if you need to pay extra for these or not, using Rita Marie’s contact form.
One last tip: Order a bigger coop than you think you’ll need.
Whether you’re buying a premade chicken coop, getting a coop kit, or buying DIY chicken coop plans, all coop companies underestimate the space that chickens actually need.
Although you really can pack a lot of chickens into a small space, their quality of life will be much lower.
There truly are a lot of factors that play into how much space your chickens need. For more information, see my article, How big should your chicken coop be?
But as a rule of thumb, make sure your coop provides your chickens with at least 4 square feet per bird. And if you can give them more space than that, they’ll be grateful.
My Rita Marie’s coop is 6x8 and will be housing 11 free-range chickens. That’s between 4.3 and 4.4 square feet per chicken.