How to move your chicks from the brooder to the coop: 9 tips for a smooth transition

Follow these 9 tips to make your chicks’ move from the brooder to the coop as stress-free as possible.
This post contains affiliate links for my favorite products from Amazon and Chewy. As an Amazon and Chewy Associate, I earn from qualifying purchases at no extra cost to you.
Tip #1 Move your chicks to the coop as soon as they are fully feathered.
Chicks are typically fully feathered at 5-6 weeks of age. And believe me, they’ll be wreaking havoc in your brooder by then—you’ll be desperate to move them out!
For more information on this topic, see my article, From brooder to coop: When to move your chicks outside.
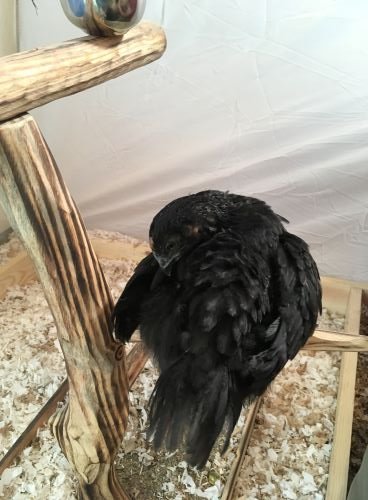
Chick Madge is fully-feathered at 4 weeks old. She feathered out a bit early. Other chicks in this batch didn’t fully feather for another couple of weeks.
Tip #2 Move familiar objects into the coop with your chicks.
Move your chicks’ feeders, waterers, and brooder plate into their coop.
It doesn’t matter if they’ve outgrown their feeders and waterers, and it doesn’t matter if you aren’t able to plug in the brooder plate (or if it’s too hot outside to want to do so). Just having the objects there will make your chicks less fearful—this is the chick version of a child’s security blanket.
Tip #3 Dump your chicks’ soiled brooder bedding into the coop.
But research confirms that chicks experience less fear in a novel environment if that environment contains familiar smells.1-3
And when chicks are placed in a new environment and given a choice between living on their old soiled litter or on fresh litter, they choose their old soiled litter.4
By taking this one simple step of dumping your chicks' brooder bedding on top of the fresh bedding in your coop, your chicks will be much happier making the move.
Tip #4 Place your chicks’ brooder plate next to a low roosting bar.
If your coop is small, and, therefore, the roosting bars are low in height, place your chicks’ brooder plate next to the roosting bars.
If your coop is larger and your roosting bars are fairly high above chick level, consider building a simple, temporary roosting bar at a lower level. Place it next to your chicks’ brooder plate. This will encourage them to roost earlier than they otherwise would.
I actually did this step earlier for my last batch of chicks—I put a low roosting bar next to my chicks’ brooder plate while they were still living in their brooder at about 5 weeks old. They learned to roost on it almost immediately.
In the photos below, you can see one of my chicks. Madge, exploring the roosting bar from her brooder plate (photo 1) and then landing on the roosting bar (photo 2). These photos were taken seconds apart.
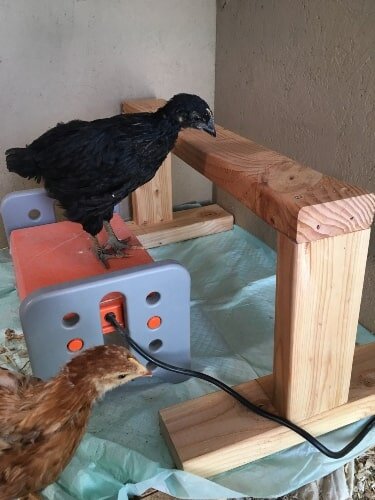
Madge stands on her brooder plate to check out her new roosting bar.

Madge takes the leap from her brooder plate and lands on her roosting bar for the first time.
Tip #5 Block nesting boxes in the coop.
Your chicks won’t start laying until they’re at least 16 weeks old. In the meantime, block the nesting boxes in the coop. You can just cover them with cardboard if you want. This will prevent your chicks from sleeping in the nesting boxes (and getting them filled with poop).
You want your chicks to associate nesting boxes with laying, not with sleeping. But at only 5-6 weeks of age, your chicks don’t understand what laying is. So, block the boxes until your chicks are old enough to understand.
Tip #6 Consider the temperature and plan accordingly.
If you’re moving your chicks outside into heat they’re not used to, make sure the coop and run are cool enough for your chicks to handle the higher temperature. Add fans if you need to.
Similarly, if you’re moving your chicks outside into cold they’re not used to, add a Sweeter Heater if you need to.
Some people move their chicks out into the coop and run for the day and then bring them in at night if the temperature is too low. I prefer to just use the Sweeter Heater.
A word of warning here...
Sometimes, no matter how well you plan, the weather will screw you over.
This happened with the last batch of chicks I raised. When the chicks were fully-feathered, it was too hot outside to move them into the coop. I had expected the temperatures to be in the 70s as was typical for that time of year, but we had an ungodly heatwave hit - temperatures were above 100 degrees for days on end, sometimes as high as 110!
Because my chicks were adapted to a 70 degree temperature in their brooder in my house, 110 degrees would be way too hot for them to bear straight off. Even with the use of fans, the coop just felt too hot.
So, I kept the chicks in their brooder for several more weeks. They were almost 12 weeks old before the heat wave died down and I was able to safely move them outside.
While, of course, this wasn’t ideal, this was what was best for my chicks.
This is also one of the many reasons I recommend using a camping tent for your chick brooder. My camping tent gave my chicks enough space to live happily indoors for several weeks longer than anticipated.
For more on using camping tents as brooders, check out my articles:

My last brood of 4 chicks see their coop for the first time. Unfortunately, due to freakishly hot weather, I could not safely move these chicks from brooder to coop until they were almost 12 weeks old.
Tip #7 Check on your chicks frequently the first few days and nights.
If your chicks are too hot or cold during the day, bring them back inside until the weather changes or you can figure out a way to adjust the temperature in the coop. Perhaps you need to insulate it or move it into the shade, for example.
And definitely check your chicks at bedtime. If they look particularly cold, the night is only going to get colder, so you may need to bring them back inside at night until they’ve had a chance to adjust to cooler temperatures.
Or, refer to tip #5 above—Sweeter Heaters and fans.
I like to keep a baby monitor in the chicken coop for the first week my chickens move in. Just to make sure everybody’s happy and all’s well. I also like to use the speaker function on the monitor so I can talk to them in the coop and tell them how special they are. But I’m undoubtedly a crazy lady, so…
Tip #8 Spend time with your chicks in their new housing (if they like you).
If your chicks have imprinted on you, or otherwise seem to derive comfort from your presence, spend some time with them in their new housing. This will greatly lower their fear level and help them understand they are safe and secure in their new quarters.
If, on the other hand, your chicks are afraid of you, leave them be to get adjusted to their new settings on their own.
Tip #9 Don’t force your chicks to go into their run if they don’t want to.
Your chicks may be terrified to leave the safety of the coop. Like many young animals, chicks can find that thresholds (like the pop door) are very scary. Let them explore the pop door and leave the coop at their own pace.
For some chicks, this may take several days or even weeks. Yes, I’ve seriously had chicks take that long to choose to go outside.
The only time I’ve forced chicks out into the run was the very first time I raised chickens. The chicken coop was too hot, so I made the chicks go outside for their own safety. I immediately got to work insulating the coop. (Turns out insulated coops aren’t optional in areas that don’t have shade—learn from my mistake.)
If your chicks are imprinted on you, they’ll be happy to follow you out into the run and back into the coop whenever you please. This is one of the many benefits of imprinting. Your chicks are much less fearful and they trust you to keep them safe in novel environments.
Regardless, make sure that both your coop and your run have food and water available while your chicks are adjusting to their new home. After your chicks are comfortable in both areas, you may remove the food and water from the coop if you’d like, and just keep it in the run.

Poppy and Madge check out their run for the first time. They’re not quite ready to step out of the coop just yet, and that’s just fine. No need to force them—they’ll do it on their own schedules!
Sources
Burne, T. and Rogers, L., “Odors, volatiles and approach-avoidance behavior of the domestic chick (Gallus Gallus Domesticus).” International Journal of Comparative Psychology, v. 8, no. 3, 1995, p. 99-114.
Jones, R., “Presence of a familiar odourant accelerates acceptance of novel food in domestic chicks.” International Journal of Comparative Psychology, v. 13, 2000, p. 147-153.
Jones, R., Facchin, L., and McCorquodall, C., “Social dispersal by domestic chicks in a novel environment: reassuring properties of a familiar odourant,” Animal Behaviour, v. 63, 2002, p. 659-666.
Jones, R., and Gentle, M., “Olfaction and behavioral modification in domestic chicks,” Physiology and Behavior, v. 34, 1985, p. 917-924.