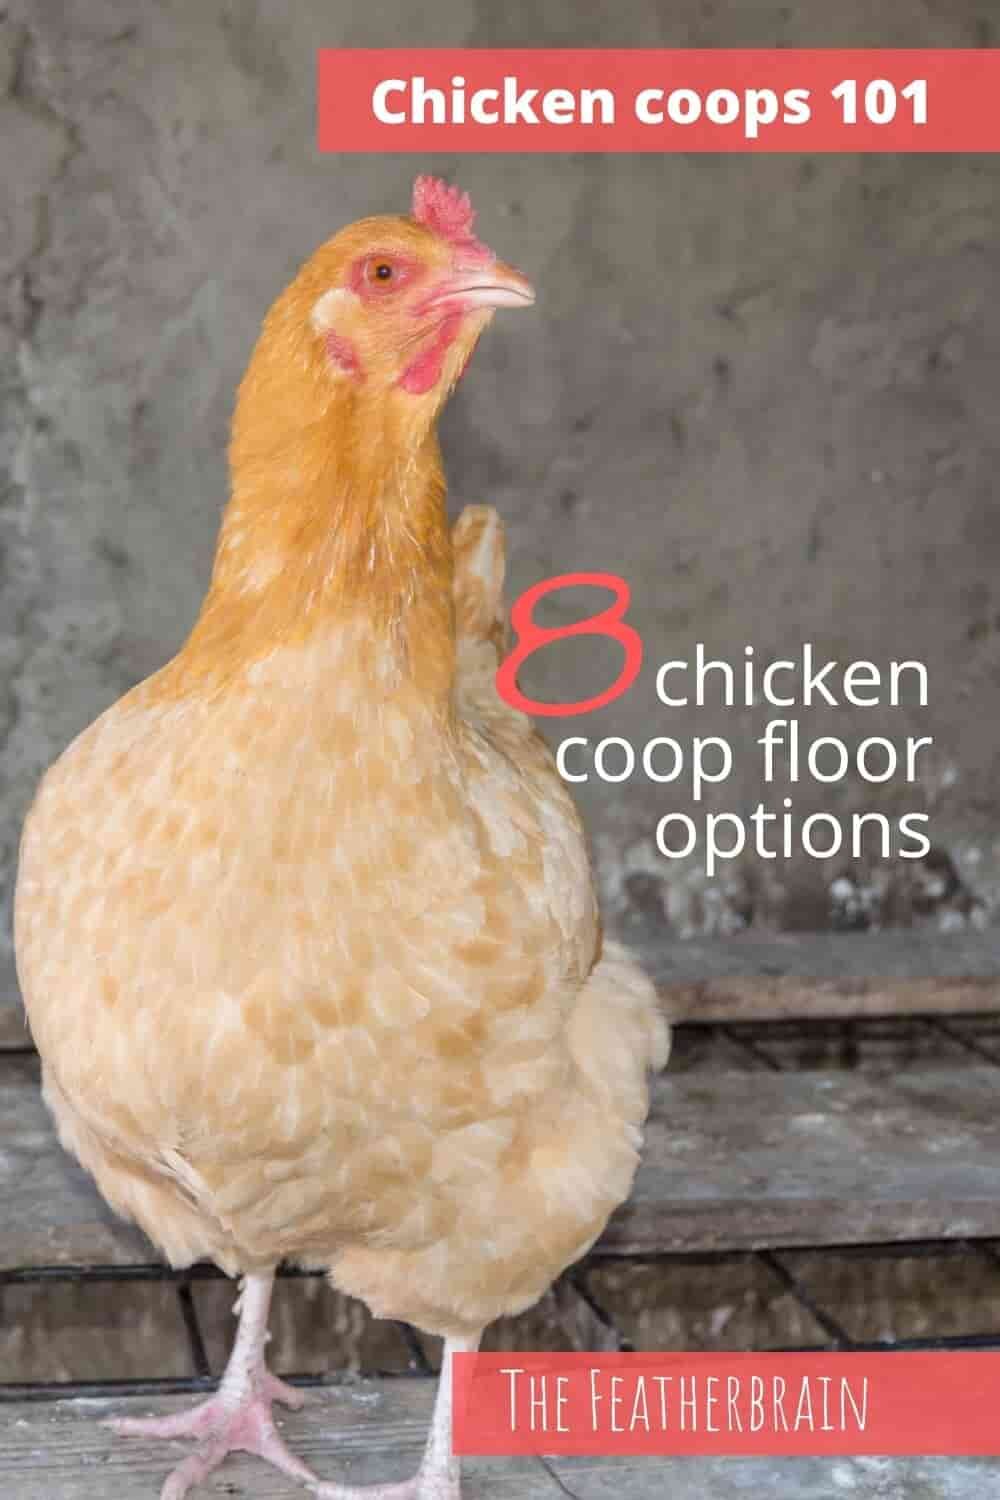
8 chicken coop floor options: The best flooring materials for your coop
Let’s talk chicken coop floors. There are so many options! Some are good at keeping predators out of your coop. Some are easy to clean. Some are easy to build.
One popular flooring material is toxic for your chickens. Another popular option may result in your chickens getting broken toes.
Choosing the right floor for your chicken coop is incredibly important for your chickens’ health and happiness, and for your sanity. After all, you’re the one who has to build, clean, and maintain it.
So what materials are best for chicken coop floors? Several different flooring materials are suitable for chicken coops, including concrete, plywood, and linoleum. Good chicken coop flooring is safe, predator- and rodent-proof, durable, and easy to clean. Flooring materials vary widely in quality, cost, maintenance needs, and safety.
In this article, you will learn:
The pros and cons of using the 8 most common chicken coop flooring materials
Solutions to many of the cons associated with flooring materials
Which flooring materials are safe and which ones you should avoid
Which flooring material is right for your coop
This post contains affiliate links for my favorite products from Amazon and Rita Marie’s Chicken Coops. As an Amazon and Rita Marie’s Associate, I earn from qualifying purchases at no extra cost to you.
Do you need a floor in your chicken coop?
The short answer is no, not in some locations. However, if you don’t build a floor, you will need to take certain precautions to ensure that your chickens remain healthy and safe from predators. For more information, check out my article, Does your chicken coop need a floor?
You may also be interested in my related article, What is chicken coop bedding and do you need it?
The 8 most common materials for chicken coop floors
The materials discussed in this article are:
Concrete floors in chicken coops
Pros of concrete
Durable
Low maintenance
Easy to clean and disinfect
Protection from burrowing predators
Keeps out rodents
Cooler in warm weather
Cons of concrete
May be expensive
May have gaps between the concrete and coop walls (risk of predator entry)
May cause injury to chickens’ feet and legs
May crack on unstable soils
Permanent structure (if you want to move your coop, you can’t move the floor)
Colder in cold weather
Why you will love a concrete coop floor
Most chicken keepers who have concrete love their concrete. Concrete is a very safe flooring choice as it keeps burrowing predators out. After the initial installation, concrete is low maintenance, does not rot like wood floors, and can take plenty of abuse without consequence.
One of the nicest things about concrete is how easy it is to clean. In the warm months, you can hose it off, or, even better, spray it with a pressure washer. You may even want to consider installing your concrete floor at a slight angle towards the coop door so that the water and muck can easily drain out during cleanings.
If you want to pour a concrete slab, but you are totally clueless on how to do this, check out the YouTube video below:
I’ll end this section with a love letter from a chicken keeper to her concrete floor. I found this letter here on the blog, Northwest Edible Life, and it reads:
Dear Concrete Chicken Coop Floor:
How do I love you? Let me count the ways.
1. You are so satisfying and easy to clean with everything from a broom to a pressure washer
2. You stay so nice and dry
3. You keep the f%&!king rats out.
Love,
Erica
A note about concrete floor and rats
In the love letter above from Erica to her concrete chicken coop floors, she says she loves that the concrete keeps the rats out of her coop. However, be aware that in some areas, even if rats can’t get into your coop, they may burrow underneath your concrete slab and nest there.
Below is a YouTube video that shows a concrete area being removed, and hundreds of rats are found underneath it.
For most of you, this will never be a problem. However, if you live in an area that is prone to rat infestation, you may want to make a “rat wall.” In fact, in some urban areas, “rat walls” are required if you pour a concrete slab.
How do you make a “rat wall?” You just dig a thin trench around the perimeter of your pad area. So, dig 2 feet deep and 6-8 inches wide around the perimeter. When you pour the concrete, both the trenches and the pad will be filled.
You will only be able to see the pad from up above, but the concrete trenches serve as “rat walls.” Now, rats will not be able to burrow under your concrete pad to nest. The concrete trench provides a barrier.
How to install a less expensive concrete floor
I found an excellent solution to expensive concrete floors from Gail Damerow’s book, Storey’s Guide to Raising Chickens (a must-read for any new chicken keeper!).
Damerow suggests a concrete-mix as a low-cost alternative. Here are her step-by-step instructions:
Step 1 Mix dry cement with rock-free or sifted soil in a 1:3 ratio
Step 2 Apply the mixture on a dirt ground
Step 3 Spread the mixture across your dirt surface, making sure it is 4-6 inches (10-15 cm) thick everywhere
Step 4 Level the soil-concrete mix
Step 5 Tamp the area down until it’s smooth
Step 6 Add water to the new floor and mix lightly
Step 7 Let it set for several days
In Gail Damerow’s own words, if you follow these steps, “You’ll end up with a firm floor that’s easy to maintain.” If you’ve tried this approach, please let me know how it went in the comments at the bottom of this article.
How to fill gaps between concrete and coop walls
Many of you won’t have this problem. Your coops will sit flush against the concrete floor. However, if there are any gaps between your coop and the concrete pad, you will need to fill them with sturdy material.
Check out the section below on using a rubberized roof coat material as a floor liner. This may be one good solution to filling any gaps. Please let me know in the comments at the end of this post if you have any others.
How to prevent injuries to chickens’ feet and legs from concrete floors
This is an easy problem to solve—use plenty of soft bedding!
If your concrete surface is rough, your chickens may scrape their feet, which leaves them susceptible to bacterial infections, including the deadly bumblefoot. Soft bedding will prevent direct contact between your chickens and the concrete.
Bedding is also the best prevention for leg injuries on concrete. People have reported their chickens breaking their legs when jumping from roosting bars to the hard floor. A thick layer of soft bedding should prevent this.
Are concrete floors too cold in the winter?
Living on concrete in the winter is coooold.
I know this from firsthand experience as I live in a house with concrete floors. I first moved into my home in the wintertime several years ago. I had no rugs or furniture yet, so I had to sit and otherwise live on the concrete for the first couple of weeks. Despite having the heat turned on, I was freezing! However, once I added some rugs to my concrete floor, I warmed up considerably.
The same will be true for your chickens. A concrete coop is a cold coop, but bedding will again make the difference here. Make sure your concrete is covered in a thick layer of bedding to prevent your chickens from getting too cold.
You may even want to consider the deep bedding method. Many chicken keepers claim this method has warmed their coops, although this was not my experience when I used it.
You may also want to consider heating your coop if it’s particularly cold. I love my Sweeter Heaters from Amazon (and they keep my chickens from getting frostbitten combs). I hang them above the roosting bars in my coops, and I also use radiant heaters designed for coop safety for added warmth.
Wire floors in chicken coops
Can a chicken coop have a wire floor? Some chicken coops have wire floors, but only very strong wire should be considered. Weak wire does not provide protection from predators. Also, be aware that coops with wire floors can be detrimental to chicken health.
Overall, I don’t recommend wire floors.
Pros of Wire Floors
Protection from predators
Droppings may fall through the flooring
No bedding needed
Easy to clean in theory (see the section on cleaning below)
May be more sanitary for chickens as it removes them from their droppings
Added ventilation if coop is elevated
Cooler in warm weather
Cons of wire floors
May injure chicken feet and legs
Droppings may get stuck in the wire
May be hard to clean in practice (see the section on cleaning below)
Coop may be too drafty and cold in the winter
Coop may be too moist in the cold weather
What type of wire should you use for a wire chicken coop floor?
You should never use chicken wire for a coop floor. Chicken wire is a very weak material. It won’t last long, and it’s much too easy for any predator to rip through and gain entry into your coop.
You may, however, be able to use hardware cloth or heavy-duty 1/2” welded wire for flooring. This material is much stronger and, therefore, will last longer. If it’s attached securely to the coop, it should be predator-proof.
How to clean a wire chicken coop floor
One of the main reasons (if not the main reason) chicken keepers consider wire chicken coop floors is because the chicken droppings should supposedly drop through the wire onto the ground.
Then you can sweep or rake out the droppings from beneath the wire floor. Because the chickens aren’t able to walk on the droppings and pack them down, they should be easy to remove.
Alternatively, if you have a coop that’s portable, you can simply move it to fresh ground and not worry about cleaning the droppings at all. Below is an example of a DIY portable chicken coop with wire floors:
(For more on this style of coop—an A-Frame coop—check out my article, DIY A-frame chicken coops: Fast, cheap, and easy to build.)
This all sounds good in theory, but do a quick search of ‘wire floors’ in chicken-keeping forums and you will find that most people who have wire floors dislike them. In practice, the chicken droppings don’t actually fall through the wire.
The problem is that the wire mesh needs to be very small to keep out predators and rodents, but then this means that most of the droppings won’t be able to fall through.
These floors, then, end up as very unsanitary, stinking messes that become very difficult to clean. The droppings will also get packed onto your chickens’ feet when they walk around. Your chickens will carry them into their nesting boxes. You’ll not be happy when you go to the collect the eggs and don’t have any that are clean.
Veteran chicken keeper, Gail Damerow, once again gives a solution in her book, Storey’s Guide to Raising Chickens.
Damerow gives these instructions for building a wire floor:
Step 1 Use a wooden framework for the floor
Step 2 Consider making the framework in small, removable sections
Step 3 Fasten the wire to this framework
Step 4 For cleaning, remove the sections and spray them down with a pressure washer
Step 5 Leave them in the sun to dry
If you are able to remove the wire floor from your coop in this way, you can much more easily clean the droppings off.
Why wire floors are not ideal for your chickens
Despite the benefits of a wire floor, chickens don’t thrive on them. I do not recommend you use wire floors. There are many better options.
You definitely don’t want your chickens living on a wire floor in cold or wet weather.
Wire floors on the ground allow too much moisture to raise into the coops. If your chickens’ feathers get wet, they won’t be able to stay warm, and they will be much more susceptible to illness and premature death.
Alternatively, if your coop has wire floors that are elevated, the coop will be much too drafty in cold and wet weather. A drafty coop will make your chickens have a difficult time retaining the body heat they need to survive the winter.
Elevated wire floors may also allow water into the coop during windy and rainy weather, again threatening the health and comfort of your birds.
Wire floors are also hard on your chickens’ feet. The more time your chickens spend in the coop, the more susceptible they will be to foot and leg injuries sustained from walking or even resting on wire. Injuries may include sores on their feet and musculoskeletal problems in their legs.
Some chicken keepers have even reported that their chickens have gotten their toes stuck in the wire and have broken their toe bones trying to get away. If you have a chicken get a toe or foot stuck in your wire floor, she may panic and injure her legs as well. There is nothing scarier for a chicken than thinking a predator may have gotten a hold of her!
Wooden board (non-plywood) floors in chicken coops
Pros of wooden floors (non-plywood)
Readily available
May be low in cost
Easy to build
Cons of wooden floors (non-plywood)
Difficult to clean – droppings and bedding get stuck in between and under the boards
If spacing is too wide, predators can get in
May rot over time
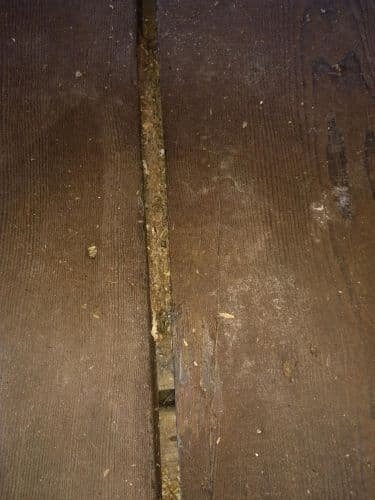
One of my chicken coops has wooden boards as a floor, and the floor is definitely harder to clean. I bought this coop used from Craigslist, so I needed to thoroughly clean it before use. I had to use a pressure washer to remove all the debris. I was able to get most of it.
The photos below show this wooden floor post-pressure washer cleaning. You can see that even after pressure washing, some of the debris remained behind in the cracks.

If you want your coop to have a wooden floor, plywood is a much better option than boards.
Plywood floors in chicken coops
Pros of plywood floors
Readily available
Low in cost
Easy to build
Easy to clean
Easy to maintain
Keep predators out
Keep rodents out
Cons of plywood floors
Difficult to clean if you don’t use bedding
May rot over time
Almost all of my chicken coops have plywood floors, and I’ve had no problems with them. I highly recommend them as a safe and durable choice for you and your chickens. As long as you are using bedding, your plywood will be very easy to clean. You simply remove the droppings with the bedding.
Also, as long as you are both using bedding and your floor is not sitting directly on a chronically wet ground, your plywood shouldn’t rot.
Chicken coop floor liner materials
The following sections detail chicken coop floor liner materials. These materials will need to go on top of another flooring material, most commonly plywood. They may also be used on other wooden (non-plywood) floors.
Sometimes people use liners more sparingly to try to fill in gaps, such as between a concrete floor and wooden wall (see the Rubberized Roof Coat Material section for one possible option).
The most commonly used liners are:
Paint
Linoleum and vinyl
Rubber mats
Rubberized Roof Coat Material
As I mentioned before, if you use a good thick layer of bedding, you don’t really need any additional liners. However, some chicken keepers prefer to use liners for ease of cleaning.
Painted chicken coop floors
Painted wood or plywood has all the pros of wood floors, and one additional pro. The paint provides added protection against wood rot.
However, if you are using bedding in your chicken coop, which is highly recommended in most cases, you really don’t need this extra step. There is one exception, and that’s if you are planning on doing a massive annual deep clean, as some chicken keepers do.
If you do an annual deep clean, you may be spraying a lot of water and disinfectant on your wood floor. Painting your floor will help to extend its life in these cases.
If you aren’t using bedding in your coop, then your wooden floor will be more susceptible to rot because it will be constantly exposed to the moisture of chicken droppings. Paint can go far in protecting your wood floor, but you want to be careful it doesn’t start peeling or your chickens will devour it.
To learn how to maintain a coop floor with no bedding, check out my article, What is chicken coop bedding and do you need it?
Linoleum and vinyl chicken coop floors
What is the difference between linoleum and vinyl?
According to Wikipedia:
Linoleum is a floor covering made from materials such as solidified linseed oil (linoxyn), pine rosin, ground cork dust, wood flour, and mineral fillers such as calcium carbonate, most commonly on a burlap or canvas backing.
Whereas:
Modern vinyl floor tiles and sheet flooring and versions of those products sold since the early 1980s are composed of colored polyvinyl chloride (PVC) chips formed into solid sheets of varying thicknesses (1/8" is most common) by heat and pressure.
IMPORTANT: Many vinyl flooring materials are TOXIC for Chickens!!! See below for more information.
Pros of linoleum and vinyl floors
Some types are durable
Some types are low in cost
Help prevent wood rot
Easy to clean and disinfect
Cons of linoleum and vinyl floors
Some types are not durable
Good quality may be expensive
Slippery and may cause injury
VINYL IS TOXIC (see below for details)
The quality of linoleum and vinyl floors varies greatly
Although vinyl and linoleum can be durable and prevent wood rot, there seems to be a very wide range in quality and price. You may be looking at a “you get what you paid for” scenario.
One chicken keeper said:
“I made the mistake of getting some cheap Home Depot linoleum. Well, it ends up that it is mostly paper, and the chickens like to rip it up if they find a corner to pick at.”
More affordable vinyl and linoleum products don’t tend to hold up under multiple cleanings. Another chicken keeper tried sheet vinyl in her coop and said that when it ripped in one spot, she had to replace the entire sheet. The vinyl just kept ripping, and bedding and dirt were getting stuck underneath it. In her words:
“Once it ripped, it was all over.”
Generally speaking, self-stick vinyl or linoleum tiles don’t do well on chicken coop floors and may be a nightmare to deal with. They don’t stick for long. As one chicken keeper said:
“…the tiles get pulled up easily and trap all manner of coop debris under the lifted edges.”
The large rolls of linoleum or vinyl are better than the tiles. Stapling them down may be a better choice than gluing them (as some glue is toxic for chickens, see below).
Vinyl is toxic for your chickens
As Gail Damerow says in her bestselling book, The Chicken Health Handbook:
“…vinyl (PVC) is often passed off as linoleum. Vinyl flooring may contain lead and other heavy metals, which are highly toxic… To make matters worse, vinyl gets its flexibility and durability from plasticizers called phthalates, which are also toxic.”
Damerow says that chickens have been known to peck and eat vinyl, especially if they’re bored, such as in the long winter months. So what will happen to your chickens in these cases?
“If vinyl is eaten, the eventual result is gastrointestinal and neurological problems in the chickens and in any person who regularly eats their eggs.”
So not only will your chickens get sick, you may get sick too. I would never take a chance with vinyl in my coop. However, if you do decide to use vinyl, make sure you use a very thick layer of bedding so your chickens can’t consume the poisonous material.
With both linoleum and vinyl, you need to be careful what kind of glue you use to glue the flooring down. Many common glues are also toxic for chickens. Make sure you look at the Material Safety Data Sheet for any glue you are thinking of using in order to see if it’s toxic or not. You can find these data sheets online.
I highly recommend using a staple gun to staple the linoleum or vinyl down, rather than glue. This avoids the problem of glue toxicity altogether.
You must use bedding with linoleum or vinyl flooring
Aside from the very serious problem of vinyl toxicity, you’ll want to use bedding for a second reason. Vinyl and linoleum are incredibly slippery. Chickens can seriously injure themselves, including dislocating their hips, on slippery surfaces.
Make sure your flooring is covered with a thick layer of bedding at all times in order to avoid harm to your chickens.
How to install linoleum or vinyl flooring
The YouTube video below shows in detail how to install sheet linoleum or vinyl:
The man in this video used vinyl instead of linoleum, which is risky due to its toxicity. I recommend only using linoleum.
Linoleum and vinyl flooring takeaways
Just remember these 4 things:
Use linoleum rather than vinyl if possible (vinyl is toxic)
Use staples rather than glue if possible (glue may be toxic)
Use sheet flooring rather than tiles (tiles won’t last)
You get what you pay for (cheaper varieties are not durable)
Rubber mat chicken coop floors
Some chicken keepers have used rubber mats to protect their wood floors from moisture. Most of these keepers are using rubber mats meant for livestock, such as these rubber horse mats from Amazon.
Other keepers have used heavy duty indoor/outdoor floor mats.
Bedding is highly recommended if you’re using mats as floors.
Pros of rubber mat floors
Easy to clean (easy to remove, hose off, and let sun-dry)
Stick to the floor naturally without adhesive or stapling
Add a little padding to the floor
Not Slippery
Cons of rubber mat floors
May be expensive initially
Rubberized roof coat material for chicken coop floors

Rubberized roof coat materials are very popular among chicken keepers. This stuff gets recommended over and over again in chicken keeping forums as the best chicken coop floor liner.
You can find this material at your local hardware store, or you can order it online. See rubberized roof coat material (Blackjack #57) on Amazon.
Blackjack #57 is commonly used as it’s low in cost and available most places. This roof coat material was designed to protect roofs in all extremes of weather.
The material is a coat of rubber that will completely seal your chicken coop floor. It seals all the floor seams and even the seam where the wall meets the floor. The material essentially becomes a part of the floor, and does not tear or scrape off.
Chicken keepers claim it lasts pretty much forever.
My only concern is that I don’t know if there’s anything toxic in these roof coat materials. They seem to just be mostly rubber. You’ll definitely want to take a close look at the ingredients. If you do use this material in your coop, I highly recommend covering it with a thick layer of bedding. This way your chickens won’t get direct exposure.
Pros of rubberized roof coat flooring
Waterproof
Flexible and resists cracking
Durable
Cons of rubberized roof coat flooring
Must be applied correctly or won’t seal or harden well
How to use rubberized roof coat material on your chicken coop floor
Here’s how you apply the rubberized roof coat material to your chicken coop floor:
Step 1 Stir well—this step is crucial! You need to stir it really, really, really well.
Step 2 Pour a large amount onto the floor.
Step 3 Use a paint roller on a stick to spread it around your floor—you want it thick. It will settle out to be thinner.
Step 4 Repeat above steps as needed until your entire floor is covered
Step 5 Make sure to seal the seam at all walls
The first step listed here—stirring well—is incredibly important for the roofing material to seal and settle on your chicken coop floor. As one chicken keeper said:
“…it has to be stirred like it’s in a blender… After this, it’s bulletproof.”
If you don’t stir it well enough, it will crack, stay too soft, and peel. If you make this mistake, you’ll need to remove all of the material from the floor, which is quite a challenge.
Some have suggested using a tile mortar mixer paddle and a ¾ inch drill to smooth the rubberized roof coat material until it is silky smooth. Others have suggested having the paint department at your local hardware store mix it for you. One chicken keeper said she had the paint department mix it twice, and that she insisted the first time it be mixed upside down.
How long does rubberized roof coat material take to dry?
The rubberized roof coat material is water based, so the amount of humidity will affect the drying time. More humidity means it will dry more slowly. Lower temperatures may also make it dry more slowly.
Some chicken keepers have recommended applying it to your coop floor during a dry spell when the temperatures are in the 60s or higher. In these conditions, the material should dry within 24 hours.
If you apply the material in more humid or cooler conditions, it may take 3 days or more to dry. Some chicken keepers have put brooder heaters on the material to help it dry more quickly.
What kind of chicken coop bedding should you use on your new floor?
After you’ve decided what chicken coop floor is best for you and your chickens, you’ll need to decide what bedding to use. I prefer sand, but straw is also a good option. Pine shavings are toxic and should be avoided at all costs.
To learn what type of bedding will work best for you, check out these resources:
Sand for chicken coop bedding: Pros, cons, and how to do it right
Straw for chicken coop bedding: Pros, cons, and how to do it right
A comparison of 21+ chicken coop bedding materials: The good, the bad, and the ugly
The BEST chicken coop bedding: Sand vs. straw vs. pine shavings
Where can you buy a premade coop with a high-quality floor?
If you want to buy a high-quality premade coop with safe and durable flooring, I recommend Rita Marie’s Chicken Coops. These are Amish-built coops that can be shipped anywhere in the contiguous U.S., and can even be placed in your yard for you.
The coops come in any size and style you could dream of, and their floors are wooden. You can upgrade your coop floor with glass board (a fiberglass layer) or epoxy (a hard-cured coating).
The coops are all built on legs or runners, so your floor doesn’t touch the ground. Pressure-treated pinewood is used for any leg or runner that touches the ground, making these coops ultra-durable!
For more information on Rita Marie’s Chicken Coops—and to see photos of mine and others—check out my review article, The BEST luxury coop you’ll ever buy: Spoil your chickens with Rita Marie’s.
What else must you know about chicken coops?
Check out my free training video, Chicken Coops 101: Designing Your Chickens’ Dream Home, for everything you need to know about your first chicken coop. I’ve designed this training to answer that long list of questions you have, but that you can’t seem to find good answers for.
Building or buying your first chicken coop is a challenge, and you definitely want to get it right. I’ve made it easy for you in this training video.
You may also be interested in:
The BEST luxury coop you’ll ever buy: Spoil your chickens with Rita Marie's
Why you should never buy a chicken coop from Amazon or Walmart
Does your chicken coop need to be in the sun or in the shade?